The permaculture principles and ethics guide the permaculture process; but they give no hint as to how to DO permaculture. Permaculture methods are techniques & technologies that create results, and will vary significantly in different locations, climates & cultures.
Permaculture is not anti technology, but most of what we call technologies these days are high-tech gadgets, with multiple, long supply chains, and are made from, or depend entirely upon, fossil fuels. Permaculture appropriate technologies are generally low-tech, but mainly they are resilient and non destructive (environmentally and socially positive). Another common (related) term is “Appropriate Technology“.
So this page is for a few key methods that have worked (or not worked) for us. We’ll also post in the Blog, as we try new things and evaluate others. Many are not exclusive to permaculture of course, and are borrowed from many other approaches to sustainable gardening.
Ideally, one takes a scientific approach. You need to observe and measure, so you can calculate yield, based on the inputs to the design. There’s no point creating elaborate looking schemes if they don’t actually provide some return.
Herb Spiral
Let’s start with one we haven’t even done yet. The Herb Spiral. There’s a rumor somewhere that if you are doing permaculture, you must have a herb spiral… Bollocks, of course. I have no doubt they are good idea, especially for small gardens where you need to concentrate the herbs you grow into one area. However since our garden is spread out; a bit of a rambling mess sometimes; I’ve never really felt the need to create one at home. Although I have included them in Permaculture Designs sometimes -where the site is suitable – usually and especially when there is an existing mound of dirt that needs using, and a source of water nearby.

Greywater Use
During the summer months, we switch our bathroom’s shower water to flow onto the fig, citrus trees or lawn area (it gets a rest in winter to avoid water-logging the soil). It flows into a 14m long / 30cm deep trench filled with scoria rocks. Some households managed to divert a whole lot more than this, but our house layout makes this impractical. However the shower water provides reliable supply of extra water, saving us a lot of extra watering. We use plant-based liquid soaps where we can.
Food Forest
Food forests are one of the most exciting things about permaculture – a complete food producing system, designed (unlike the veggie garden) for very low input perennial crops, fruit trees, and self seeding annuals. Everything in a food forest should have a purpose, and most things are edible. Even the weeds provide mulch, ground cover and help build the soil.
Ideally you’ve got an acre or more to play with (ours is a bit over 100m2), but the general idea is that once the system is established, it should function and yield continuously (increasing over time) even with negligible human input.
Ours however is very much a work in progress, and was never fully planned from the beginning, rather letting things grow and die as they wanted, as we built up the soil and our own experience.
2015 Update: We’re in the process of implementing a new design, a dozen new trees, and almost 50 companion plants and support species. You can read more about it on this blog post.
Composting
Composting is an essential part of any food growing garden and EVERYONE should do it. It’s just such a no-brainer thing to do. It’s recycling nutrients and kitchen waste back into the soil from your own garden, but importantly, it’s a way of incorporating organic matter from outside the garden (we get coffee grounds, leaves, grass clippings). This avoids having to buy in lots of fertilizer and manures to replace nutrients that are lost from the system when fruits and veggies are harvested.
I’ve listed composting as a technology (or technique if you like), because there’s definitely science behind the methods involved. You can read whole books on composting, but here’s the techniques we use in a sentence or two:
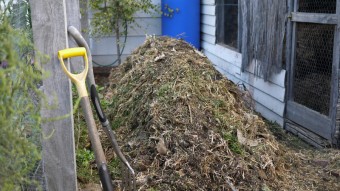
Cold Composting: Just layered grass clippings, weeds and the odd bucket of scraps or bag of coffee grounds. The worms, bugs and micro-organisms really go to work, and such an uninspiring pile can produce the most amazing light and fluffy humus soil if given enough time (about 8-12 months). Sounds like a long time, but this is set and forget, requiring little work.
Hot Composting: When we do a big mow (or get bins of clippings from friendly gardening contractors), we make a big hot compost. Heaps of weeds, comfrey, sprinkling of manure, straw from the chicken coop – anything at hand. Just throw it all together in a huge pile. The Carbon/Nitrogen ratio needs to be about right (25:1) to be most effective, and the temperatures inside the heap can get to 70 degrees c – hot enough to burn your hands should you shove them deep enough. Micro-organisms are multiplying by the billions, and actually cooking the material down to a compost – and this all happens in about a month providing it gets turned a few times.
Chicken Composting: Another lazy method of composting (lazy = getting nature to do the work for you) is throwing everything into the chicken pen. The chickens eat what they want (seeds & greens), and the rest builds up a thick layer of material that gets turned over by the chickens from above, and composted by organisms from below. Once a year it all gets built up into a big hot compost pile of it’s own before being spread on the garden.
Worm Composting: If nothing else, a small worm farm can fit into any sized space or balcony. Worms eat grass, paper, coffee grounds and all manner of kitchen waste (there’s just a few things you need to keep out, or keep to a minimum – eg onion and citrus. They are very efficient, and can yield a high quality compost (called worm castings) that can go straight on the garden, and a bonus is ‘worm juice’ you can use as a liquid fertilizer.
Update: Goshen did a compressive tour of all the composting systems on site on this Blog Post: https://wattspermaculture.com.au/a-tour-of-9-composts/
Water: Capture & Storage
Water storage & capture is one of the key elements of a permaculture system. Water falling on a property as rain (or runoff) is a significant and FREE resource, so it makes total sense to capture it for later use, rather than paying for chemically treated drinking water.
In Geelong, average rainfall is 520mm per year (who knows now with climate change, but it still rains!). We have 11,500L of storage, a little less than half of which is used to water the garden via a pressure pump, and even this runs out after about 4 weeks in the height of summer without a decent summer downpour. However even this storage enables us to save a huge amount of water, only needing to use mains water for 1-2 months. More/bigger tanks would be nice, but lets not forget that industrial (and organic) agriculture uses hundreds of litres of water per kg of produce, so there’s no need to feel guilty. Our total water use, including the garden, is still far below the average household.
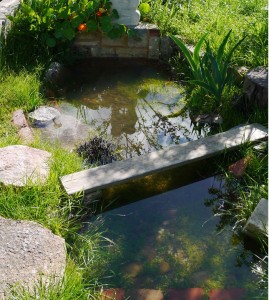
Our other major water harvesting solution is our pond / overflow system. After the water tanks fill up, water overflows into the ‘plunge pond’ refreshing the water, before overflowing into the ‘wetland’, which is a dry pond between the veggie garden and fruit trees. If this fills up, water then enters a creek/swale which surrounds the fruit trees – injecting hundreds of litres into the soil as it goes.
Whatever method is employed, the idea is to capture & store the water, and slow it down as much as possible before it leaves the property (if at all). In winter, such systems need to be managed so they do not flood and water-log the soil.
Swales
Swales are another cliché of permaculure. The idea is to dig/rip a level trench and resulting mound across a hillside. Fruit trees etc are planted in the mound. When the water comes down the hill and collects in the swale, it slowly infiltrates the ground and waters the trees – concentrating both the water and nutrients at that site. In some locations they are great, but in practice, whether they are used or not depends on many factors (for example, in some locations it may be better to ‘Keyline Plough’). The aim of any design, is to slow down and infiltrate available water and improve the soil. In our case, we are on a fairly flat / small block, and we definitely don’t have swales – but we have dug mini trenches, small creeks, depressions etc – all which act to slow down and absorb water, and allow it to charge the ground water during heavy rain events and over winter – without flooding the system.
Greenhouse
Some form of protection for seedlings during our winter months is also a nearly essential part of growing your own food – especially when growing from seed. Even a piece of glass / old window frame up against some bricks can do a similar job at no cost. However the greenhouse has many functions: It captures water; grows plants; raises seedlings, provides shade, dries seeds & herbs and definitely not least – is a fantastic place to spend a cold wintry few hours.
Espalier Fruit Trees
 Apart from just looking nice, espaliering is a technique than keeps fruit trees a more compact and manageable size – and a productive way of growing fruit trees against walls & fences. It’s great in urban permaculture simply because you can fit more trees into the same space, and be able to access the fruit better. We have a line of citrus trees that are espaliered against our North-facing fence, and these are starting to be very productive.
Hügelculture
Perhaps a new fad in permaculture, ‘hugelculture’ beds are nevertheless a good way of using up excess tree prunings and branches too big for the compost. The idea is to dig a trench, fill it with wood and prunings, then cover with a layer of soil and compost. You do this in Autumn, so in winter as the wood starts to rot down, it stores a large amount of water and nutrients, which the plants access for extended periods.
I built one in a fairly neglected part of the garden, and while we did get a yield, I think on the whole it was neglected a little too much – and certainly once the really dry weather hits, without additional water it still dried out like any other ‘raised bed’. However I’d definitely try another one.
Rocket Stoves
What a great little fun gadget these are. Using only a few sticks as fuel, they can heat water, cook and even heat spaces. The insulated internal chamber combusts the gases inside, producing very little smoke and concentrates the heat at the top for cooking.
We created one (at a hosted Rocket stove workshop) out of an old solvent tin, and some cans/oil tins.
Currently we are experimenting with a rocket-stove pizza-oven. Ambitious, but it has been done, and I’m confident we can produce something that will cook using a fraction of the fuel of a traditional wood oven.
There’s more methods which we haven’t yet branched into, although we have sometimes been involved in helping others create them, via ‘permablitzes’ or workshops:
- Aquaponics
- Wicking Beds
- Chicken Tractors
- Composting Toilets
- and many more, of course.
For larger properties and farms, additional techniques like keyline ripping, larger scale swales, dam building, holistic grazing, alley cropping and numerous other techniques can be employed to repair ecosystems, and improve productivity.


